I need to monitor multiple UV wavelengths for my sample. How can I do this with ASTRA™?

Introduction
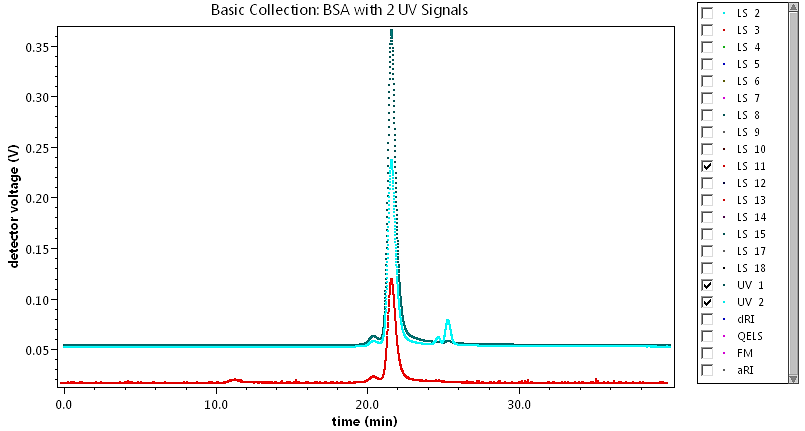
Collecting multiple UV wavelengths in ASTRA is useful for processing experiments where the sample contains two separate components that absorb at different wavelengths. For example, for conjugated proteins such as protein-DNA/RNA complexes where both the 260 nm for DNA/RNA absorption and the 280 nm wavelength for protein absorption could be collected at the same time. For proteins, you can also choose to monitor both the standard 280 nm absorption as well as 214 nm for higher sensitivity as shown in the picture.
Note: This article applies to analog UV signals. ASTRA 8 and HPLC CONNECT™ provide native support for recording digital UV data make it easy to capture multiple UV wavelengths.
Adding UV channels
If you already have a UV instrument in your ASTRA method configuration, then you can add another channel connection which will be described further below. If you don’t, then first add one by right-clicking on your configuration and choosing Replace Configuration. Then, navigate to a configuration that supports a UV detector such as Configuration | Light Scattering | HELEOS™ | with Optilab™ rEX | UV + LS + RI online.
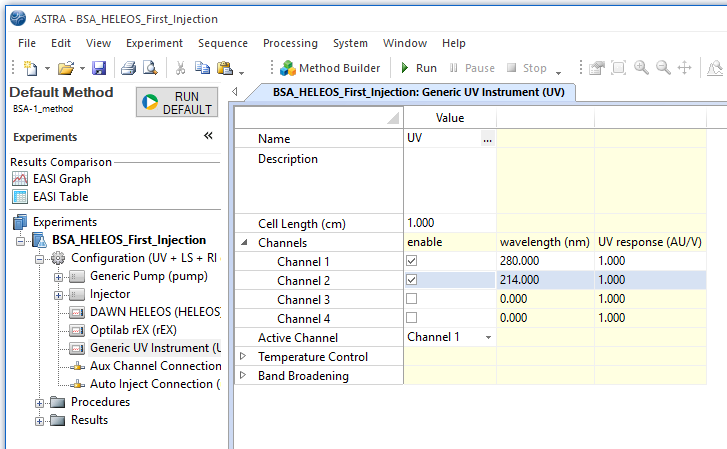
Once you have a Generic UV instrument in your configuration, select it and click on the [+] sign next to Channels to expand the UV channels. Check the box to enable Channel 2 and enter the appropriate wavelength. Ensure that the Active Channel selected is the primary wavelength that will be used in data analysis. You can change the active channel during data processing to process the data two different ways.
Enable collection
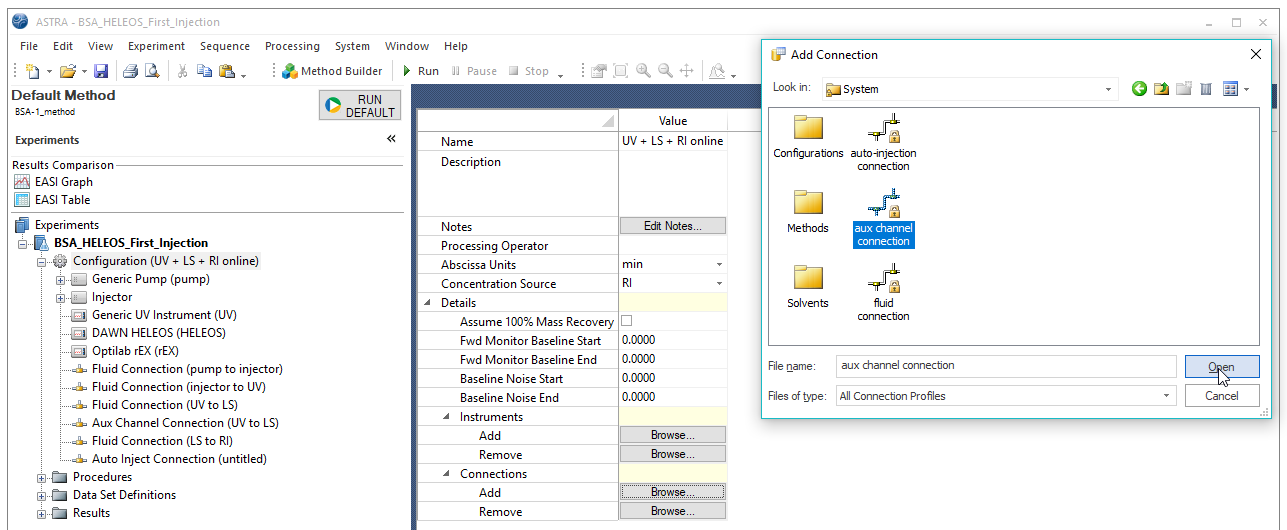
To enable collection of Channel 2, activate Experiment Builder Mode by going to System | Preferences and toggling on Experiment Builder Mode. (A checkmark will appear in front of this mode when is activated.)
With Experiment Builder Mode on, click on the experiment’s configuration. In the window that appears to the right, click to expand Details. Under Connections, click the Browse button next to Add. In the window that appears choose System | Aux Channel Connection and click on the Open button.
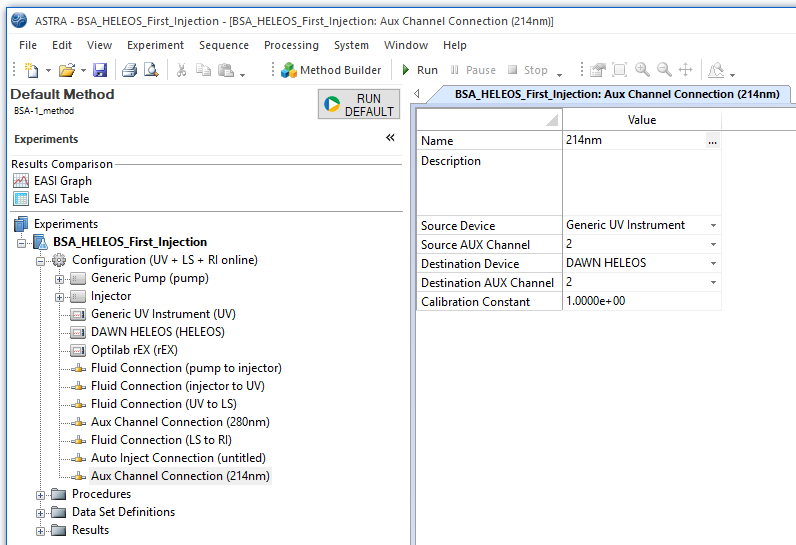
Editing the 2nd UV connection
A second auxiliary connection will appear in the left column. Fill in the details for this UV connection including the source device (Generic UV Instrument), destination device (the instrument receiving the UV signal, usually the MALS detector), aux channel numbers (the channel that corresponds to the selected source device channel—this must be different than the channel selected for the first UV connection), and calibration constant (usually 1.0). Click Ok.
Conclusion
When you collect data, you’ll be able to see two UV signals in Basic Collection. Data analysis can only be done using one signal at a time. To analyze your data make sure to:
- In the Configuration select UV as the Concentration Source
- Under Sample, check that the correct UV extinction coefficient is entered for the wavelength used.
- Select the Active Channel for data analysis by clicking on Generic UV instrument.
Advanced analysis using two UV collections is possible with our Viral Vector Analysis procedure. For more information on using this see “How do I use the Viral Vector Analysis in ASTRA 8?".
Do you have a question? Contact our experts here in Customer Support. We’re happy to help! Call +1 (805) 681-9009 option 4.